
Testing Mesh Repair and Hole-Filling
Feed a broken mesh to a repair tool and score the result against a watertight target, with manifoldness checks and surface-distance metrics.
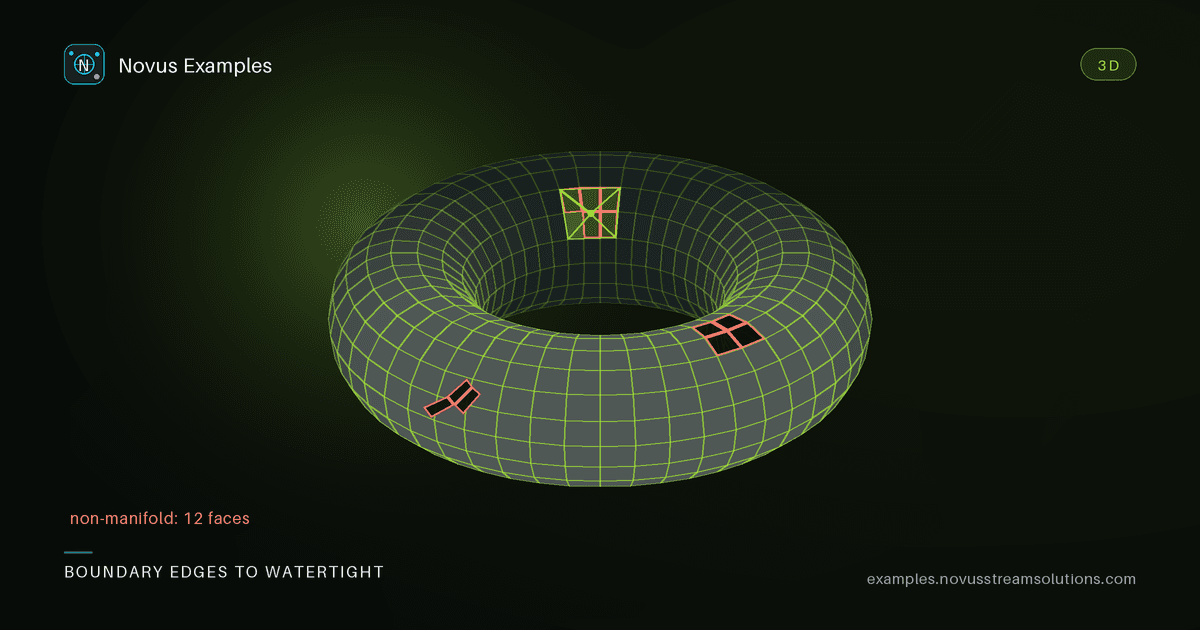
Mesh repair tools promise to take a model with holes, non-manifold edges, or missing faces and hand back something watertight and printable. Two things can go wrong: the tool fails to actually close the defect, or it "fixes" the mesh by bulldozing detail. You can only tell which happened if you have both the broken input and the intended watertight result.
Each case in the mesh-repair set ships a watertight ground-truth mesh and a deliberately broken twin of the same shape: a box with a missing top face, an uncapped tube, or a sphere with an open hole at its base. Run your tool on the broken mesh and compare the result against the watertight target.
Repair is a topology problem before it's a geometry problem, so test in that order:
- Is it watertight? Count boundary edges (edges used by exactly one face). Zero means closed. This is the pass/fail gate: a repair that leaves any boundary edge did not do its job.
- Is it manifold? Every edge should be shared by exactly two faces, and no non-manifold vertices. Some tools close a hole by adding a fan that creates new non-manifold junctions.
- Did it preserve the original surface? Now measure surface distance (Hausdorff / RMS) between the repaired mesh and the watertight target, restricted to the region away from the hole. That tells you whether the tool respected the geometry it wasn't supposed to touch.
- Is the patch reasonable? Look at the filled region's curvature. A flat cap across a curved opening is watertight but ugly; a good tool interpolates the surrounding curvature.
Zero boundary edges is the headline check, but a mesh can pass it and still be rejected by a slicer or a CAD import. Before calling a repair successful, add these:
- Consistent winding. Every face normal should point outward, and adjacent faces must agree. A patch stitched in with reversed winding closes the hole topologically while producing an inside-out region that renders black and confuses any inside/outside test.
- Positive, sane volume. Compute the signed volume via the divergence theorem. A correctly-oriented closed mesh gives a positive number; a negative one means the whole surface is inverted, and a value near zero means the "solid" has no interior.
- No duplicate or degenerate faces. Some tools close holes by stacking coincident triangles. Boundary-edge count goes to zero and the mesh is still unusable.
- No self-intersection. The single most common reason a "watertight" mesh fails to slice. A patch that bulges through the opposite wall is closed, manifold, and still not printable.
The first three are cheap enough to run on every repair in CI. Self-intersection is expensive, so it is reasonable to run it only on the cases with large openings. The open-based sphere is the one most likely to produce it.
Different defects exercise different code paths. A single missing face is an easy hole; an uncapped tube has two openings; an open-based sphere is a large curved boundary. Keep several so a tool can't pass by handling only the easy case.
Both the watertight mesh and its broken twin are constructed deterministically, so the defect is identical on every run. Your watertightness and surface-distance results are comparable across tool versions and CI runs, and any regression reproduces on the exact same broken mesh.
Start with the mesh-repair set, or the wider mesh-processing fixtures. Free to use, no attribution required.
Continue this workflow
Was this article helpful?
Found an error? Send a correction.