
Measuring Mesh Decimation Quality
Test a mesh simplifier the right way: Hausdorff distance, normal deviation, and silhouette error against a dense ground-truth mesh.
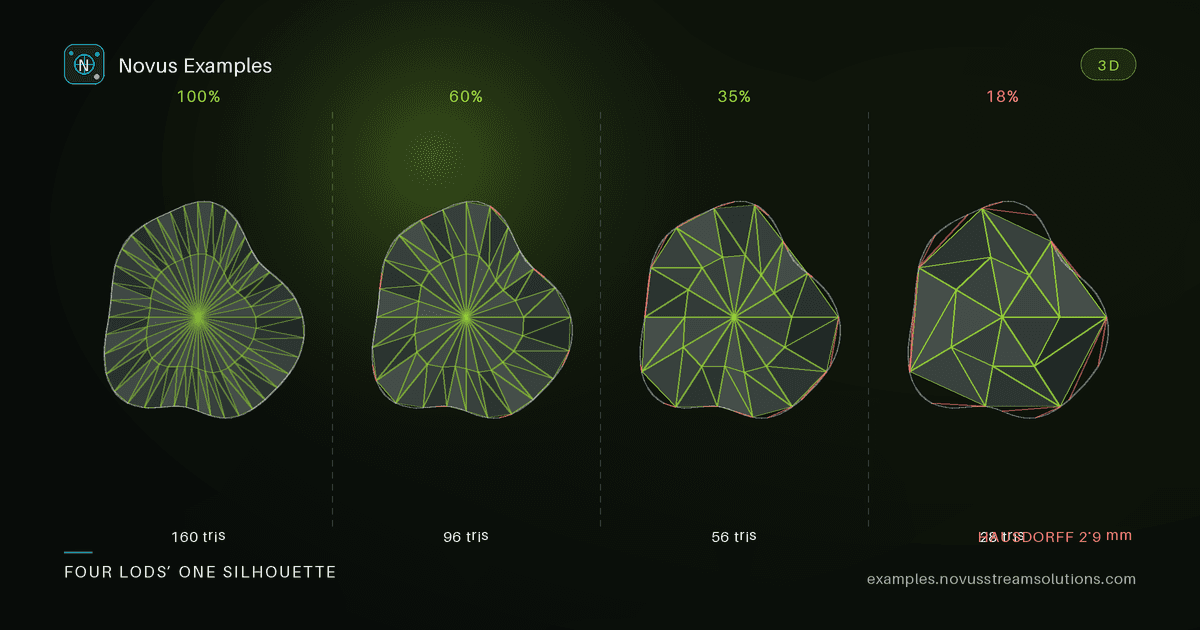
A decimation (or LOD) tool trades triangles for speed. The whole game is keeping the shape while dropping the count, and "looks the same" is not a measurement. To test a simplifier you need the original dense mesh and a way to quantify how far the simplified version drifted from it.
Each case in the mesh-decimation set ships a dense ground-truth mesh and a low-poly simplification of the same shape, with triangle counts recorded in the spec. The dense sphere and its low-poly twin are a clean starting pair: same geometry, very different budgets.
- Hausdorff / RMS surface distance between the two meshes: sample points on each surface and measure the distance to the other. This is the primary "how far did the surface move" number; report both the max (Hausdorff) and the average (RMS).
- Normal deviation: decimation flattens curvature, so compare surface normals at corresponding points. A simplifier that preserves the silhouette but wrecks the shading normals will look faceted.
- Silhouette / boundary error: render both from several angles and compare the outlines. Silhouette is what the eye locks onto, so a tool that protects it can drop far more interior triangles without looking wrong.
Track surface distance against the triangle-reduction ratio. The honest way to compare two simplifiers is at equal triangle budgets: whichever holds a lower surface distance for the same count wins.
The most common way to get these numbers wrong is to measure vertex-to-vertex distance. Decimation removes vertices by definition, so there is no correspondence to measure, and every surviving vertex usually sits exactly on the original surface, which makes a vertex-based distance look suspiciously excellent while the surface between them has sagged badly.
Measure surface-to-surface instead:
- Sample points uniformly by area across each mesh, not per triangle. Per-triangle sampling over-weights the dense regions, which is precisely where decimation did the least damage, and flatters the result.
- Measure point-to-triangle distance, not point-to-nearest-vertex. On a coarse mesh the nearest vertex can be far away while the nearest surface point is directly underfoot.
- Measure both directions and take the worse. One-directional Hausdorff misses whole categories of error: a simplifier that deletes a protruding feature entirely scores well in the direction that maps simplified onto original, because every remaining point still has a close match.
- Use enough samples that the number is stable. Re-run with a different sample count; if the result moves, you are measuring your sampler.
Report the distance as a percentage of the model's bounding-box diagonal rather than in raw units. That makes results comparable across models of different sizes, which is the only way a threshold in CI means anything.
Decimation tends to fail at high curvature and at feature edges: the rim of a cup, the teeth of a gear. Keep varied shapes in your suite (a sphere, a torus, a surface-of-revolution vase, a cylinder) so you're not tuning to one topology. A tool that's great on smooth blobs can mangle sharp features.
The meshes are built deterministically with no randomness, so vertex positions are identical everywhere and the GLB is self-contained. Your surface-distance and normal-deviation numbers are comparable across tool versions and CI runs, and a regression reproduces on the exact same mesh.
Start with the mesh-decimation set, or the wider mesh-processing fixtures and the Models library. Free to use, no attribution required.
Continue this workflow
Was this article helpful?
Found an error? Send a correction.