
Edit a Visual Template in Your Browser: Rows, Logos, and Real Exports
A practical walkthrough of the Novus Visual Studio: change every line of copy, edit table rows, drop in your own logo or background, recolour a theme, and export the sizes you need — all locally.
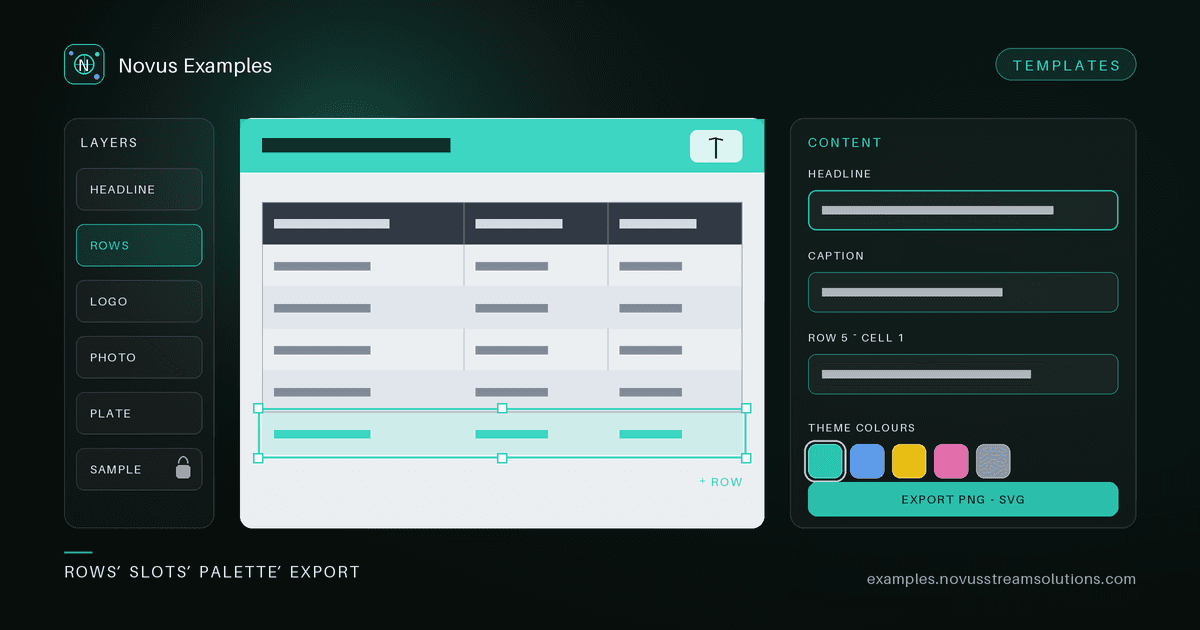
Most free template libraries hand you a flat image. It looks close enough in the preview, and then you discover the two things you actually needed to change — the words in the table and the logo in the corner — are baked into the pixels. The file is a picture of a design, not a design.
The Visual Studio takes a different route. Every template in the visual template library ships as a scene: a list of typed nodes with real text, real geometry, real colours. Nothing is flattened until you export. That is what makes a row addable rather than paintable, and a logo replaceable rather than repaintable.
This is a short tour of what that buys you, in the order you will probably need it.
Open any template and the right-hand rail leads with Content. It lists everything the template declares as editable, in reading order down the page: headlines, supporting lines, captions, calls to action, table rows, picture slots, and theme colours.
That list is not a summary of the design — it is the design's own field list, the same one printed under "Editable fields" on the template's detail page. If a template says it has a headline and a caption, both are textareas in the panel. You do not have to guess which layer holds which words, click through five candidates, and hope.
Type into a field and the canvas updates as you type. Each field also has a Style button that selects that layer, if you want to change the size, weight, spacing or colour afterwards.
Roughly one template in ten is really a row grid with different words in it: a class timetable, a menu, a fee schedule, a roster, a league table, a price list, a shift rota. Those ship as a single table node, which is what makes the row count changeable.
In the Content panel a table gives you:
- an input per cell, labelled by its column;
- an input per column heading, because someone else's column names are not yours;
- + Row and Remove row, with up and down arrows to reorder;
- + Column and per-column removal;
- Paste rows, which takes tab- or comma-separated text straight from a spreadsheet and replaces the body in one step.
The paste route is the fastest one for anything real. Select the cells in your spreadsheet, copy, paste, and the grid is populated. The box grows to fit the new row count, or the rows tighten if growing would run off the canvas — either way you never end up with rows drawn past the bottom border where you cannot see or select them.
Templates draw their placeholder marks as geometry: a rounded rectangle where a logo goes, a full-bleed plate behind everything. That keeps the library small and deterministic, but it used to mean the two things people most want to swap were colour-only.
Now every slot in the Images section takes a picture:
- Logo — upload a PNG, JPEG or WebP and it drops into the same box, keeping the placeholder's shape. A circular badge stays circular.
- Product image / avatar / photo — replace or restore in one click. Restore puts the sample back without undoing your layout changes.
- Use my own background image — the picture is placed behind the design but above the template's own plate, so it is actually visible rather than silently hidden underneath it.
You can also drag an image file straight onto the canvas. If you drop it on a slot, it fills that slot; drop it on empty canvas and it becomes the background.
A transparent PNG from a background remover works best for logos and cut-out products. Pictures are read with the browser's file reader and held in the page — nothing is uploaded, and there is no server to upload it to.
Under Theme colours each palette token — accent, ink, plate — is a colour input. Changing one recolours every mark that uses it, across text, shapes, borders, table headers and banding. That is the difference between rebranding a template in five seconds and recolouring eleven layers by hand.
One deliberate exception: sample markings keep their colour. More on that below.
Select any layer and you get eight resize grips on the canvas, plus drag to move, arrow keys to nudge one pixel, and Shift+arrows for ten. Text has a Shrink text to fit its box action that measures the real rendered width in the template's own typeface and drops the size until the longest line fits — useful the moment you replace a two-word headline with a six-word one.
Undo is Ctrl/⌘+Z, and edits to the same field collapse into one history step, so undo walks back through actions rather than keystrokes. Your draft is saved locally as you work and comes back if you reload. Reset to template returns to the shipped design at any point.
Some layers cannot be edited, hidden, reordered or deleted: SAMPLE markers, fictitious issuer names, and the disclaimers on certificates, safety signage, and legal, financial, healthcare or fitness templates.
That is deliberate. These files exist so you can test a layout, populate a design system, or mock up a document — not so a certificate template can be finished into something that passes as a real credential. Keeping the marking fixed is what lets the rest of the template be genuinely, completely editable. Recolouring the theme skips those layers for the same reason: retinting a disclaimer to the plate colour hides it just as effectively as deleting it.
Everything else on the template is yours.
The canvas is vector, so every export is a fresh render rather than a resample:
- PNG and WebP keep transparency, which matters for overlays, badges and logo lockups.
- JPEG has no alpha channel and fills white — the Studio tells you so before you pick it.
- SVG exports the vector, with fonts and images embedded inside the file.
- All sizes runs every size the template declares, one clean re-raster each.
If your template ships on a transparent canvas, tick Transparent background and hide any full-bleed background layer before exporting; the panel says this too, because a plate left switched on paints over the alpha you wanted.
- Pick a template from the library and open it in the Studio.
- Work down the Content panel: headline, supporting copy, table rows.
- Upload your logo, and a background or product shot if the template takes one.
- Set the accent colour once; let it propagate.
- Shrink any headline that outgrew its box.
- Export PNG for the web, SVG if it is going to a printer or a designer.
If you need the underlying file rather than the picture — a spreadsheet with the same table, a PDF with the same layout — the rest of the library is built for that, and the editor will open and re-export text-based formats directly. Everything here is free to use, with the licence spelled out on the licence page.
Continue this workflow
Try the workflow
Was this article helpful?
Found an error? Send a correction.